Ground Beef Stuffed Peppers
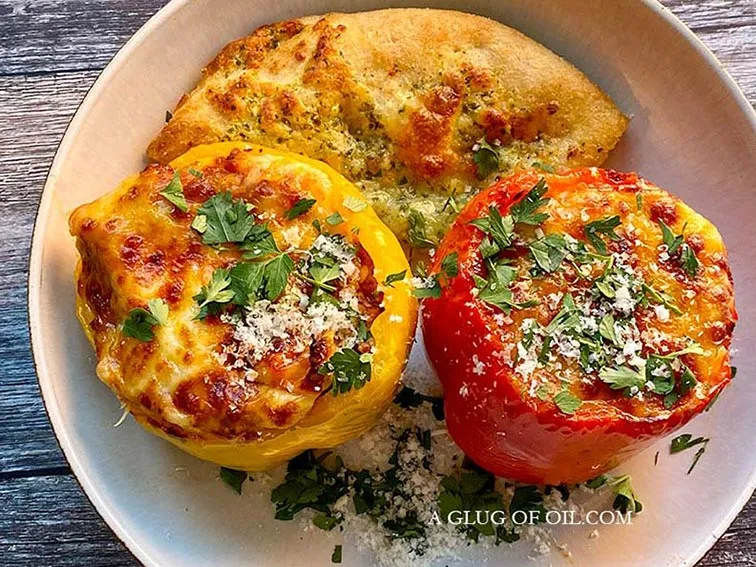
This is an easy midweek meal - peppers filled with juicy minced beef bolognese with a layer of cheese, mince mixture and yet more cheese! 😋

Cook in the Ninja Foodie Max
Oh my goodness, these bolognese stuffed peppers are soooo good to eat. An easy bolognese meat mixture is made using jar sauce - yes indeed! See below how to cook in the oven.
For years I've always made my own bolognese sauce but sometimes and for quickness and cheapness it's easier to buy a good quality jar of pasta sauce.
You could make the bolognese the day before ready to stuff your peppers the next day.
Money-saving tips and ways to save energy!
With the ever-rising cost of energy especially electricity, not just here in the UK but pretty much everywhere.
It makes perfect sense to look at money-saving ways to cook such as a slow cooker or better still if you can afford the initial layout of a multi-cooker.
Back in January this year (2022) I bought myself this Ninja Foodi Max 15-1 and I use it so much - it really is a godsend. Not only does it save time but of course energy too.
In Curry's, Argos, John Lewis and on the Ninja website it is £249 so don't be paying any more than that.
For example, in the Ninja 15-1, I can cook chicken curry in just 6 minutes (plus about 8 minutes to get to pressure) by using the pressure cook mode.
It can cook a whole chicken up to 2.5kg in just 45 minutes - it really is going to save you money rather than using your oven.

These stuffed peppers took just 12 minutes using the Steam and Air Fry function.
How to make stuffed peppers
Prepare the peppers and slice the tiniest sliver off of any peppers that won't stand up straight.

Slice the top off and, carefully remove the seeds and discard.
Make the meat sauce
Using a mixture of minced pork and beef will result in a more flavourful filling - but you can use all beef if you wish.
In a large frying pan heat up 1 tablespoon of vegetable oil and add the mince mixture.
Break the mince up so there are no lumps brown it quickly and then turn the heat right down to low.
Move the mince out of the way and add in the garlic. Cook for a couple of minutes to cook the garlic.
Then add the Italian seasoning, red pepper flakes, black pepper and just enough sauce to make a not-too-sloppy filling for your peppers.
Stir the lot together and cook over a low heat for about 30 minutes - you may think this is unnecessary, but your meat sauce will be more delicious if you cook the mince slowly.

Add a bit of cheese to the bottom of each pepper followed by some of the meat mixtures. Repeat add another layer of cheese and top up with more of the meat filling.

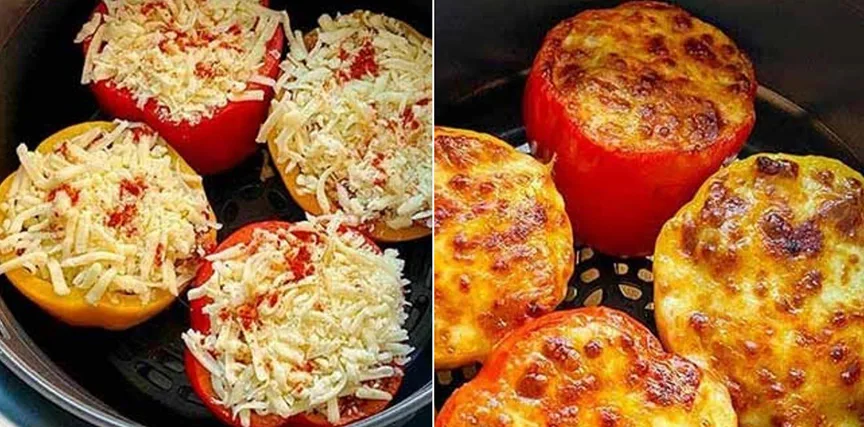
Top each pepper with cheese, Oh yes, everything is better with cheese! I sprinkled a little smoked paprika over the tops but you don't have to.

If you are cooking in the Ninja add 250ml of water to the bottom of the cooking pot. Then, place the Cook and Crisp basket inside and put the peppers in.
Close the lid and set it to Steam and Air Fry. Set the temperature to 200°C and press start.
After 8 minutes check the peppers - remember the filling is already cooked but, of course, you want the filling to be hot.
Mine took 12 minutes from start to finish and were perfect. You don't want the peppers to get too done or they will collapse.
Carefully remove each pepper and serve with garlic bread or whatever else you fancy.
To cook in a regular oven
Heat oven to 200°C/180°C fan/400°FGas 6
Place the unstuffed peppers cut-side up in a roasting tin and bake for 20 minutes.
Then add a little cheese to the bottom of each of the peppers followed by the bolognese mixture.
Top with more cheese and return to the oven for a further 10 minutes or so.
Other stuffed pepper ideas you might like

Have you tried this recipe? Please leave a ⭐️⭐️⭐️⭐️⭐️ star rating in the recipe card below!

Ground Beef Stuffed Peppers
Ingredients
- Vegetable oil
- 4 large bell peppers
- 250g 5% fat lean minced pork
- 250g 5% fat lean minced beef
- 2 garlic cloves - minced
- ½ tablespoon Italian seasoning
- 1 teaspoon red pepper flakes - or more to taste
- 1 teaspoon black pepper
- 1 x 500g jar Ragu chunky pasta sauce (or your favourite brand) you won't use the whole jar
- 200g Mozzarella and Cheddar cheese mix
- Optional - with grated Parmesan and chopped parsley to finish
Instructions
- Prepare the peppers and slice the tiniest sliver off of any peppers that won't stand up straight - slice the top off and carefully remove the seeds and discard.
- In a large frying pan heat up 1 tablespoon of vegetable oil and add the mince mixture. Break the mince up so there are no lumps and brown it quickly. Turn the heat right down to low. Move the mince out of the way and add in the garlic. Cook for a couple of minutes to cook the garlic.
- Then add the Italian seasoning, red pepper flakes, black pepper and just enough sauce to make a thickish and not too sloppy filling for your peppers.
- Stir the lot together and cook over a low heat for about 30 minutes - you may think this is unnecessary, but your meat sauce will be more delicious if you cook the mince slowly.
- Rub each pepper with a little oil and add a bit of cheese to the bottom of each pepper followed by some of the meat mixture.
- Repeat and add another layer of cheese and more of the meat filling. Finish each pepper with cheese.
- Add 250 ml of water to the bottom of the cooking pot. Then place the Cook and Crisp basket inside and put the peppers in.
- Close the lid and set it to Steam and Air Fry.
- Set the temperature to 200°C and the time to 15 minutes and press start.
- After 8 minutes check the peppers - remember the filling is already cooked but, of course, you want it to be hot. Mine took 12 minutes from start to finish and were perfect, you don't want the peppers to get too done or they will collapse.
- Carefully remove each pepper and serve with garlic bread or whatever else you fancy.
- Heat oven to 200°C/180°C fan/400°FGas 6
- Place the unstuffed peppers cut-side up in a roasting tin and bake for 20 minutes.
- Then add a little cheese to the bottom of each of the peppers followed by the bolognese mixture.
- Top with more cheese and return to the oven for a further 10 minutes or so.

No comments
Post a Comment
I love to hear from everyone so thanks for taking the time to comment. Please note comments containing links will NOT be published.
Cheers
Jan